
Attic Insulation
Insulation slows heat. Air sealing stops it from simply walking around the insulation. Do them in that order and the house changes; do them in the wrong order and you have paid to bury the problem.
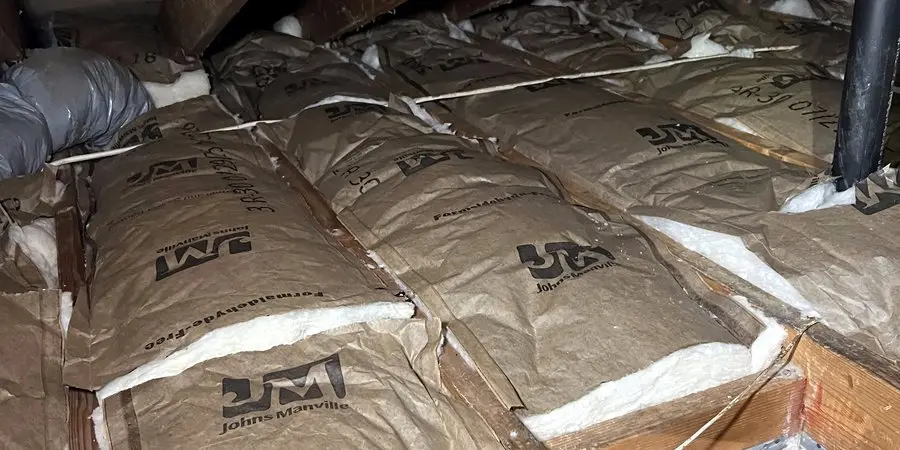
Why we always seal before we insulate
Most attics we open are not simply under-insulated — they are leaking. Air moves through top plates, around plumbing and wiring penetrations, up open wall cavities, through recessed light housings, past the attic hatch and out of poorly sealed bath fan connections. That moving air carries heat and moisture with it, and insulation laid over the top of it does very little, because fibrous insulation resists conduction, not airflow.
So the sequence matters more than the product. We seal the penetrations between the conditioned house and the attic first, protect the ventilation path at the eaves with baffles, deal with the hatch, and only then bring insulation up to depth. Energy Star puts the combined saving from air sealing and insulating at roughly fifteen percent of heating and cooling costs for a typical home — and the comfort change is usually more noticeable than the number.
It is also the moment to catch things nobody else is looking at: a bath fan venting into the attic instead of outdoors, ductwork disconnected above a ceiling, knob-and-tube wiring, or the daylight around a chimney chase. All of it gets photographed before it is covered up.
What the service includes
- Attic assessment with photographs — existing depth and type, coverage gaps, moisture staining, ventilation, wiring and any duct or exhaust defects.
- Air sealing at the ceiling plane: top plates, wire and pipe penetrations, open chases and wall cavities, plumbing stacks and the framing around them.
- Recessed light treatment — sealed correctly according to housing type, with clearances respected on non-IC fixtures.
- Bath and kitchen exhaust fans confirmed to terminate outdoors, and corrected when they are dumping moisture into the attic.
- Attic hatch or scuttle sealed, weatherstripped and insulated — one of the largest single leaks in most houses.
- Soffit baffles installed so eave ventilation stays open and insulation does not choke the airflow.
- Insulation installed to a specified R-value — blown fibreglass or cellulose, or batts where the assembly calls for them.
- Depth markers and a coverage record, so the installed R-value is verifiable rather than a claim.
- Removal of contaminated or water-damaged insulation where required, bagged and hauled away.
- Written report with photographs of the sealing work before it was covered, plus the final depth and R-value achieved.
What changes in the house
The first change is the temperature difference between rooms and between floors. Ceilings stop radiating heat down in the afternoon, the upstairs stops running five degrees warmer than the thermostat, and the system stops cycling long into the evening trying to catch up with a roof deck that has been baking since noon.
The second change is load. A house that leaks less and insulates better asks less of the equipment, which means shorter run times, less wear and — in homes where the system was marginal to begin with — the difference between equipment that keeps up and equipment that never quite does. If you are considering replacing an air conditioner because it cannot cope, sealing and insulating first is the cheaper experiment, and it sometimes changes the size of the equipment you need.
The third is moisture and dust. Sealing the ceiling plane reduces the amount of attic air — with its dust, fibreglass fibres and summer humidity — that gets pulled into the living space through gaps and through leaky return ducts. It is the same reason we look at duct sealing and insulation together.
US Department of Energy guidance for most attics falls in the R-30 to R-60 range depending on climate zone and what is already there. We measure what you have, tell you the target for your zone, and put the achieved value in writing.
Signs you need this service
- Rooms directly under the roof that run noticeably hotter in summer or colder in winter
- A system that runs almost continuously in peak weather and still cannot hold setpoint
- You can see the tops of the ceiling joists when you look across the attic floor
- Insulation that is compressed, patchy, water-stained, or full of rodent runs and nesting
- A visibly uninsulated or unsealed attic hatch, or daylight visible around penetrations
- Bath fans that vent into the attic, or moisture staining on the underside of the roof deck
- Ice damming, condensation, or persistent musty attic smell
- Energy bills that spike hard in the hottest and coldest months
Seal, protect, insulate, verify.
The insulation is the last step, not the first — because covering an air leak is not the same as fixing it.
Assess
We measure existing depth, identify the insulation type, photograph gaps, staining, wiring and duct or exhaust defects, and give you a written scope with the target R-value for your climate zone.
Seal
Penetrations at the ceiling plane are sealed with the right material for the location — fire-rated where it must be — and open chases and cavities are closed. Every seal is photographed before anything covers it.
Protect
Soffit baffles keep the eave ventilation path open, clearances are set around flues, chimneys and non-IC fixtures, and the attic hatch is weatherstripped and insulated.
Insulate and verify
Insulation is installed to the specified depth with markers left in place, the work area is cleaned, and you receive photographs, the achieved R-value and the written guarantee.
Attic Insulation: common questions
Straight answers, no pressure. Call us if yours is not here.
Not always. Dry, uncontaminated fibreglass can usually be air-sealed around and topped up. It should come out when it is water-damaged, mould-affected, rodent-contaminated, or so compressed and uneven that it prevents proper sealing. We photograph the existing condition and make the recommendation on evidence, not by default.
Department of Energy guidance for attics generally lands between R-30 and R-60 depending on climate zone and existing conditions. We tell you the target for your zone, install to a depth that achieves it, and leave depth markers so it is verifiable afterwards.
Blown material wins in most existing attics because it fills irregular spaces and covers joists without gaps; batts make sense in accessible, evenly framed areas and in some knee-wall assemblies. Fibreglass and cellulose both perform well when installed to the right depth — we explain the trade-offs for your attic rather than pushing one product.
Very much so, and in hot climates it is usually the more noticeable direction. A sealed and properly insulated ceiling plane keeps a superheated attic from radiating and leaking into the rooms below, which is what makes upstairs bedrooms tolerable in the late afternoon.